CBT Kit Manta M8P V2 + CB1 Start Guide – MPX Wiki |
您所在的位置:网站首页 › compile with sth › CBT Kit Manta M8P V2 + CB1 Start Guide – MPX Wiki |
CBT Kit Manta M8P V2 + CB1 Start Guide – MPX Wiki
|
Firmware FlashFlash M8P V2 and EBB SB2209CBT Kit Manta M8P V2 + CB1 Start Guide
Introduction
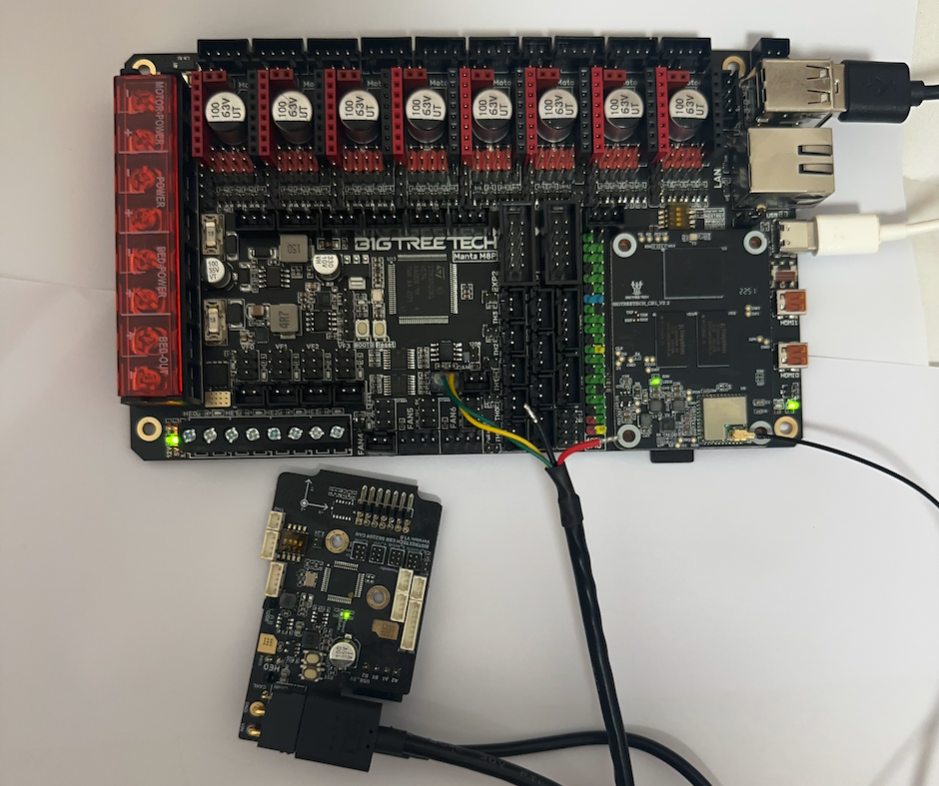
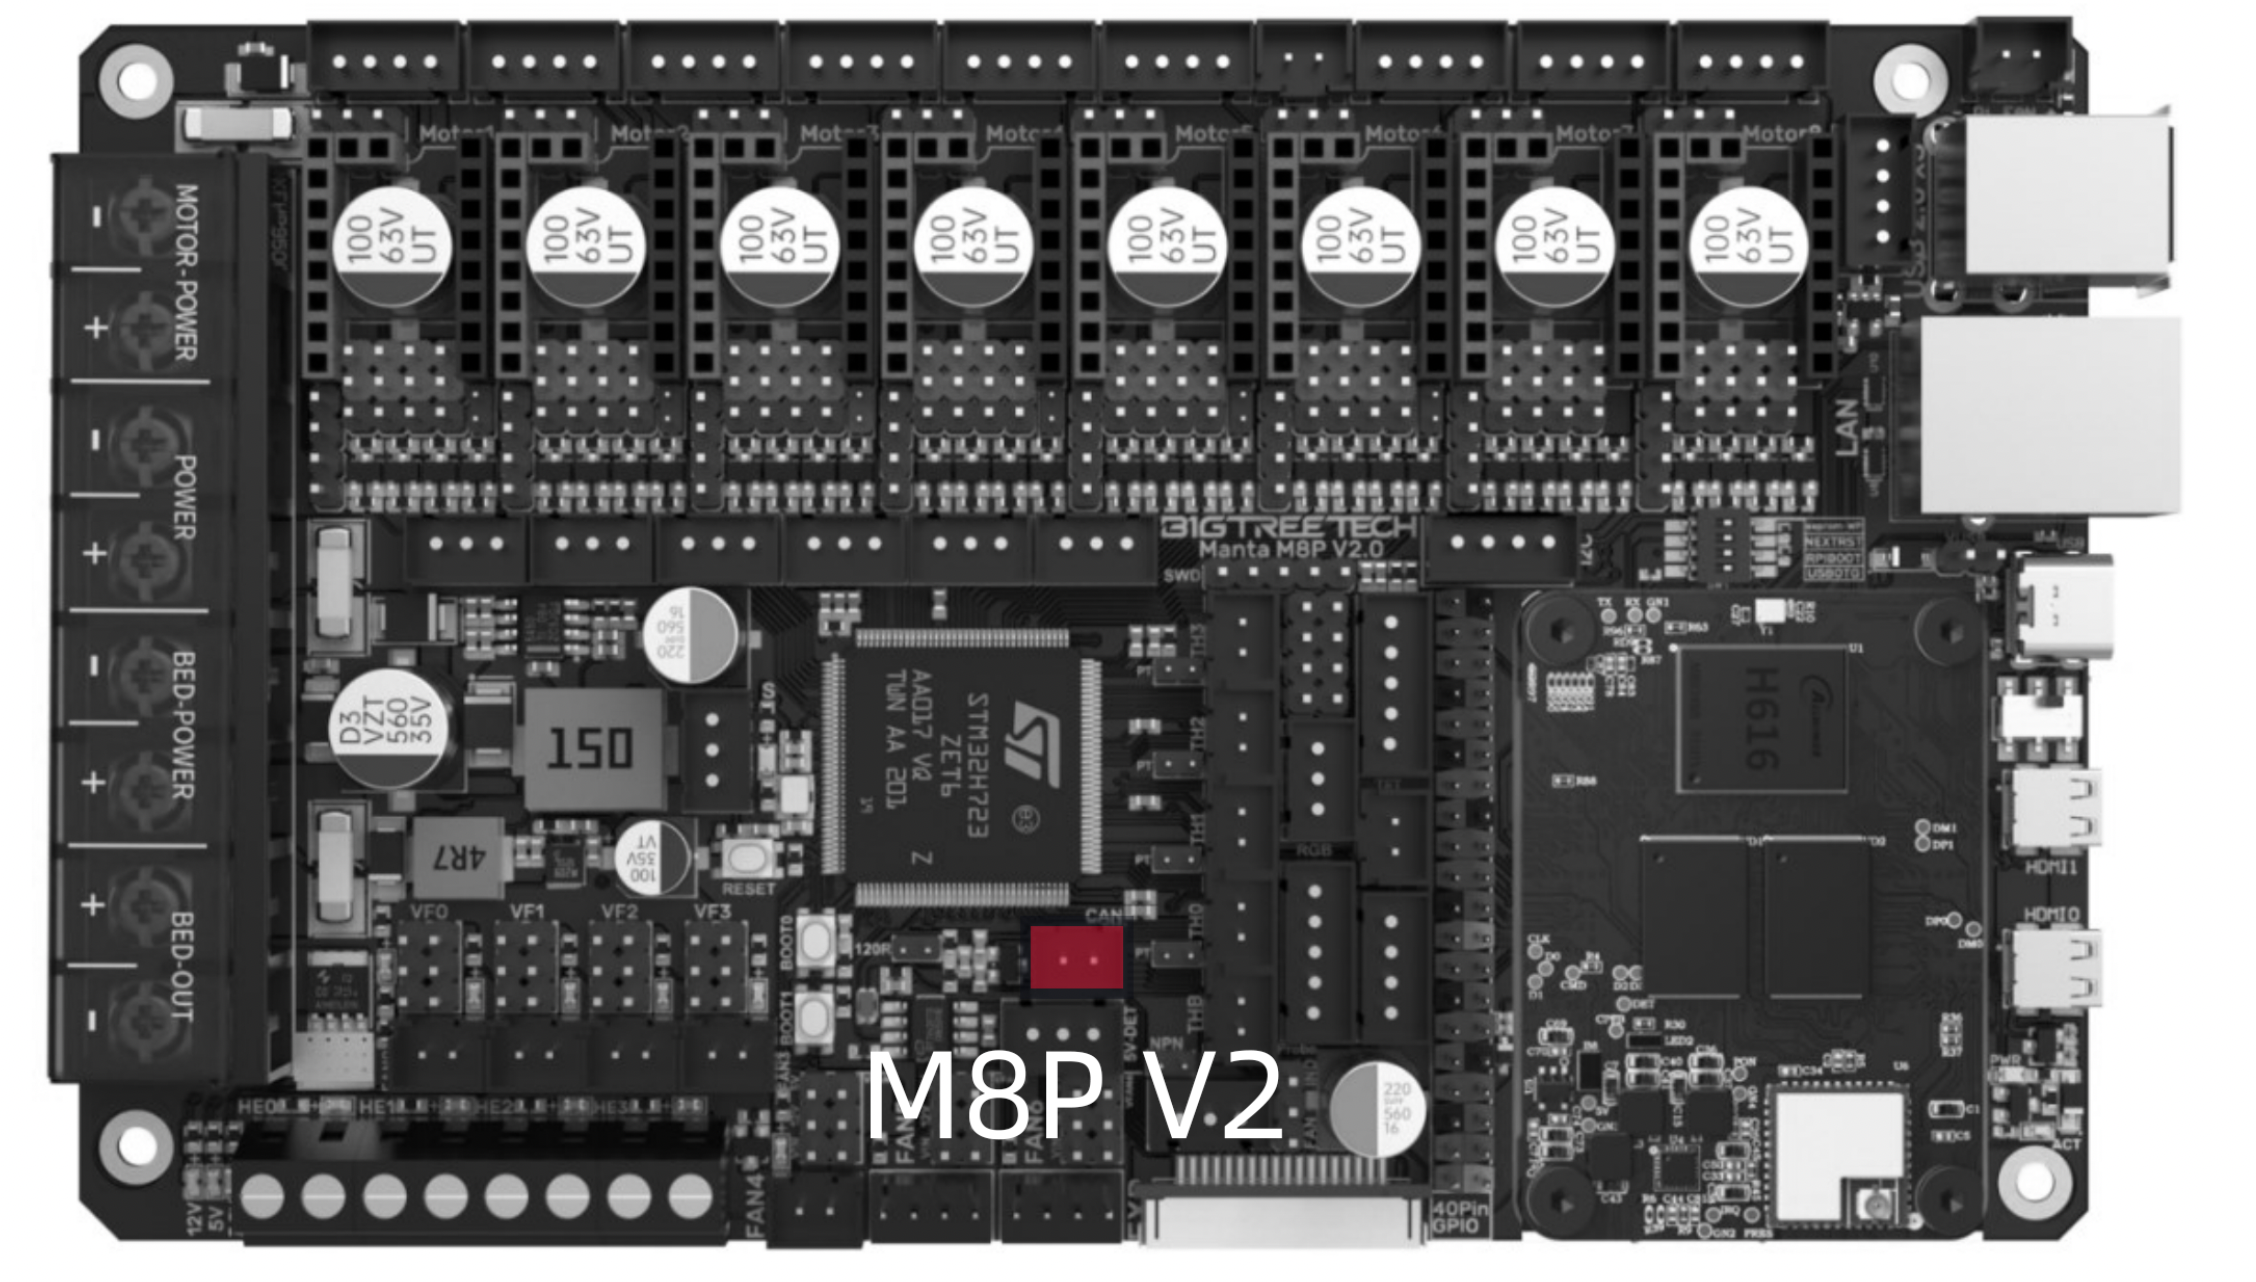
MPX kits started shipping the V2 version of the Manta M8P in late 2023. If you have the older V1 version of the Manta, please refer to the Flash M8P V1 and EBB SB2209 page. There are three microprocessors involved in running the printer: the one on the CB1, the one on the Manta M8P, and the one on the EBB SB2209 toolboard. Knowing how they all work together is important. The CB1 runs the show, the Manta gets delegated low level tasks like driving motors and fans from the CB1, and the EBB runs the Stealthburner in cooperation with the Manta. Both the Manta and the EBB run Klipper. However, you will be compiling a different version of Klipper for each board because their processors are different (though the same source code is used for each). There is also something called CanBoot that you will be compiling for the EBB as well. Canboot is what allows future updates of Klipper on the EBB to be done via Canbus instead of USB i.e. over the existing wiring of your completed printer. The process to get this all working is as follows: First you will get the CB1 processor board up and running by creating a TF card with a Linux image created by BigTreeTech (Flash CB1). Next you will get Klipper running on the processor running on the Manta. That is the big chip in the middle of the board. (Flash M8P). Next step is putting Canboot on the toolhead board with a connection between them that is initially USB so it can talk Canbus later. You do this because the toolboard isn't be able to talk Canbus out of the box (Flash Canboot to EBB by USB). The last big step is putting Klipper on the toolhead board because both ends need that for this whole thing to work (Flash Klipper to EBB by USB). After this, there are some final checks that everything is working (Flash Checks). There is a (Troubleshooting) section at the end as well in case of problems.If you have never done anything like this before, relax. Short of letting the magic smoke out, any mistakes in flashing are easily fixed by reflashing the bootloader and starting over. If you are unsure about anything, ask in the MPX discord, we will help you. PreparationYou need to provide a USB Type-C cable to plug into the Manta that can provide 5V output. We recommend USB-Type A to Type C cables. ⚠️Some Power Delivery chargers may output more than 5V via USB-C to USB-C type cables that in turn could burn out your M8P. Some also won't negotiate enough power to run the M8P at all. See the (Troubleshooting) section for more details. In addition, some PC USB ports don't have enough power to run the Manta plus the EBB, causing random issues. USB 3.0 ports should be OK but older USB 2.0 ports might be problematic as they are limited to 500 mA of current. WiringWe strongly recommend flashing the M8P and the EBB before installing them into the printer. Wire them as shown. This pic is M8P V1. For V2 the only difference is the Canbus port position has changed.
Do not connect the red and black wires on the Canbus cable or this will short out 5V to ground and let the magic smoke out. Do not leave them dangling as shown in the picture above. It is better to insulate the end of the red and black wires by tape or some other means to prevent accidental contact between the two wires, or between the wires and the Manta. Connect the green and yellow Canbus data wires to the Manta. This picture shows the header on the Manta V2 where the connection is made.
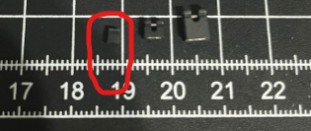
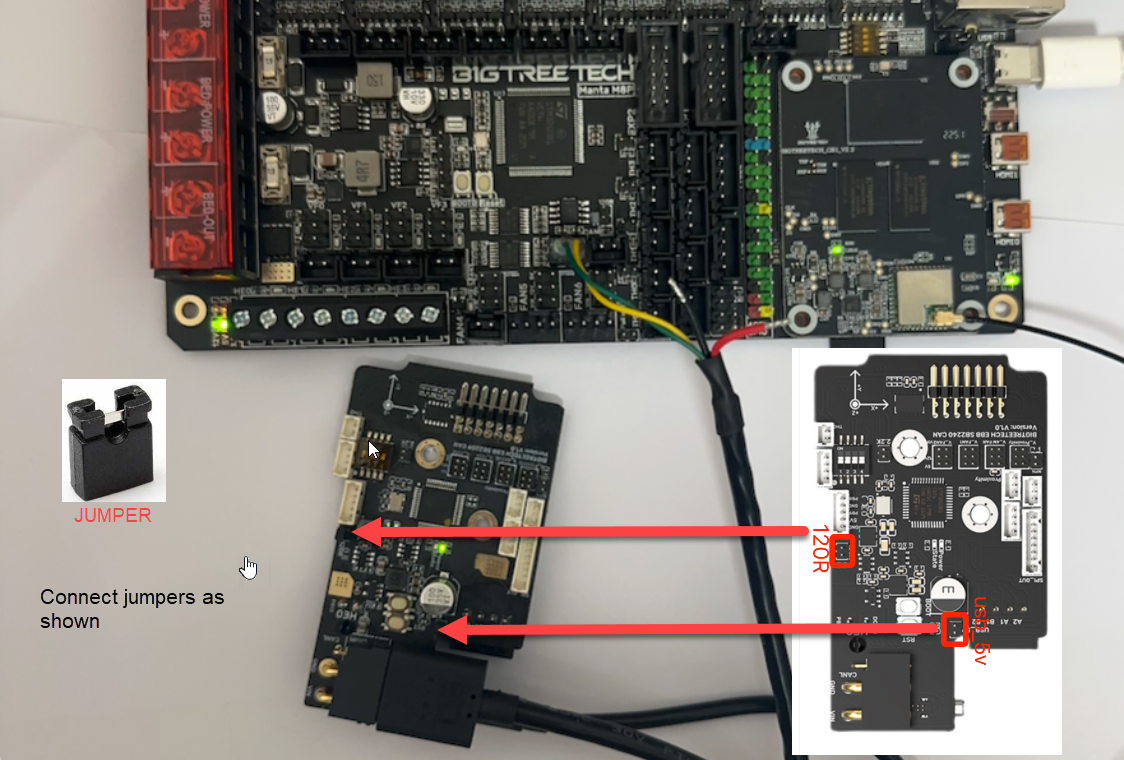
Next we need to install some jumpers on the Manta and EBB so the two boards can be flashed. Note that there are three different sizes of jumpers so make sure you use the right size for each connection. The two largest sizes are packaged with the Manta for use on that board. The smallest size (circled in red below) are packaged with the EBB and used exclusively with it. The EBB jumpers can be hard to find: look for them mixed in with some connectors and pins for that board. ⚠️The jumpers should be the same width as the headers they plug in to and should fit snugly. Using the wrong-sized jumper has been the source of numerous problems because of the intermittent connection that results.
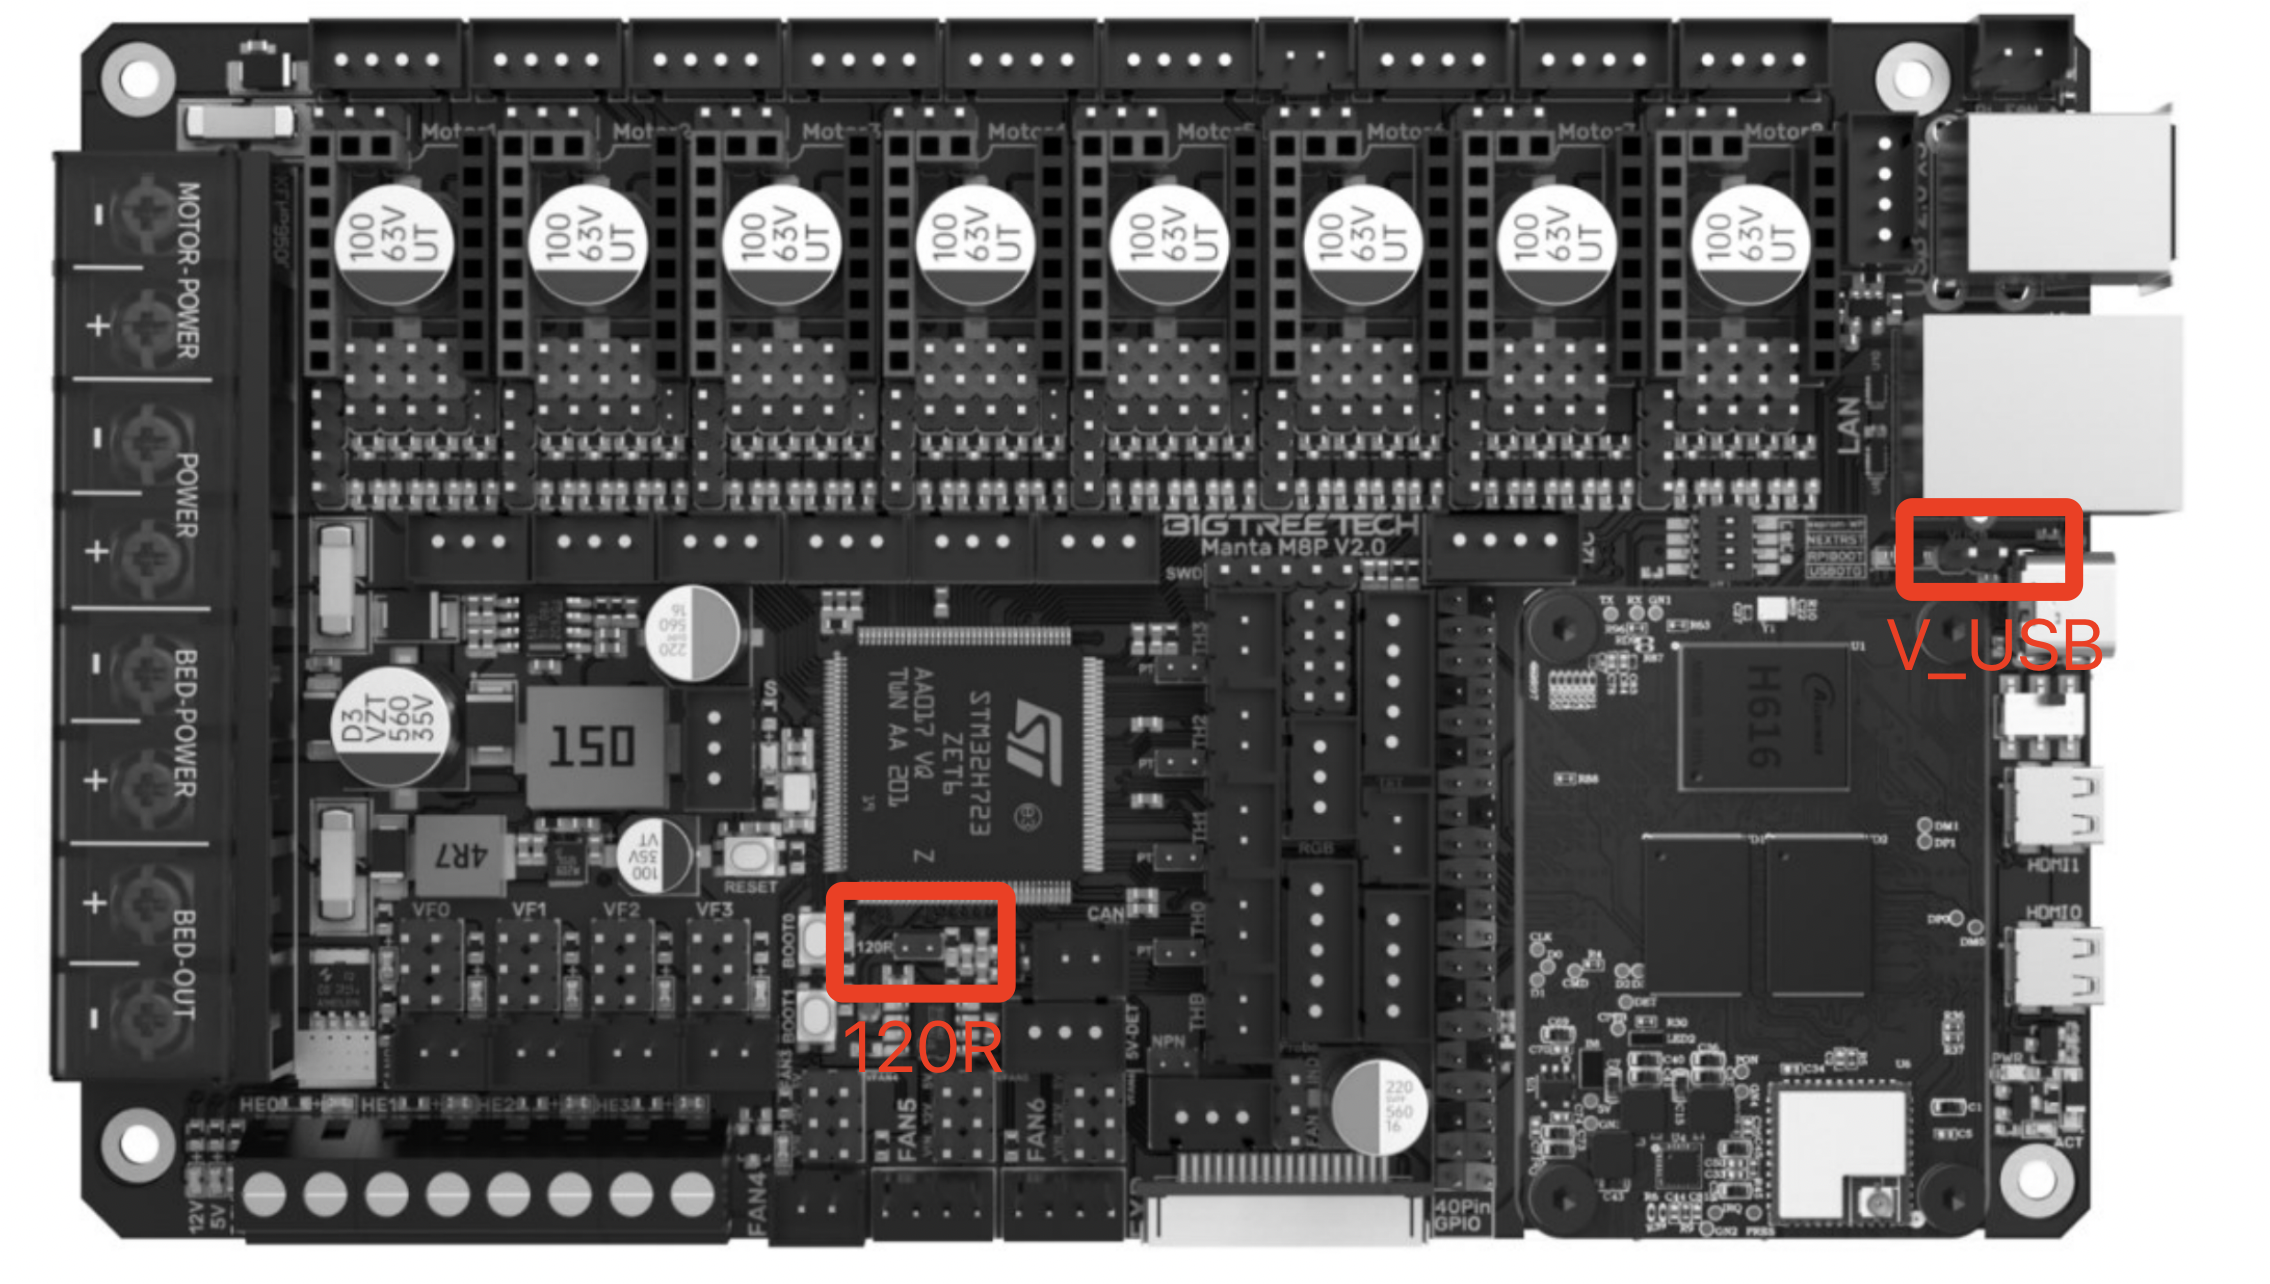
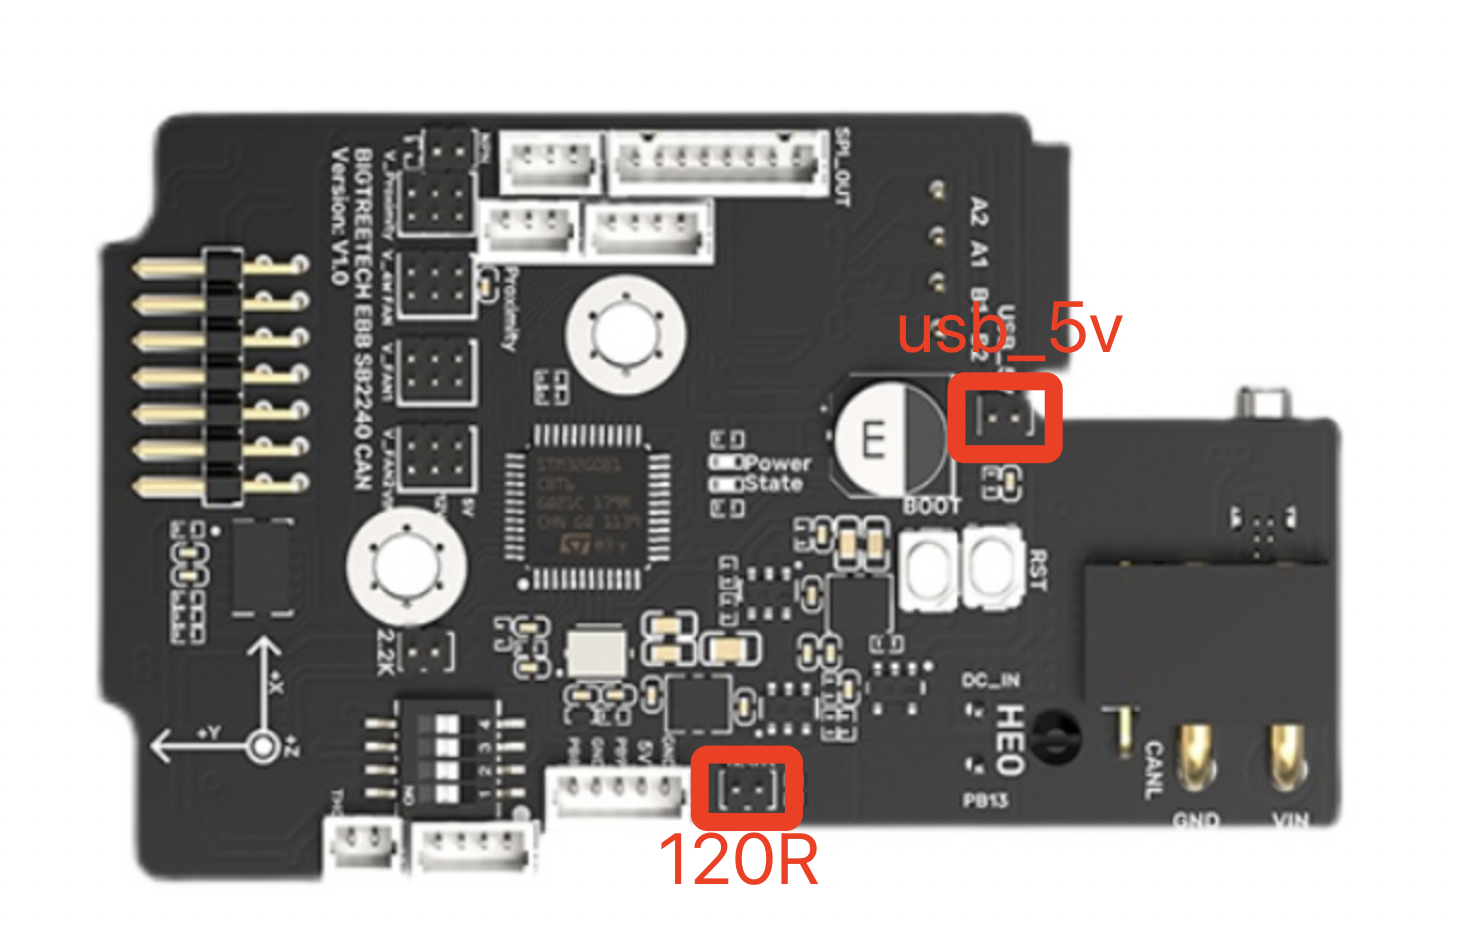
Connect the following jumpers and leave them connected until the checks at the end of this process are completed. V_USB (largest-sized jumper) and 120R (medium-sized jumper) on M8P USB_5V and 120R on EBB SB (smallest-sized jumper)
This pic is made by @Westy_Pity_Da_Fool. It may be helpful in understanding the wiring. Note that while it isn't shown clearly here, you also need to plug a USB cable between the Manta and the EBB SB2209 as well.
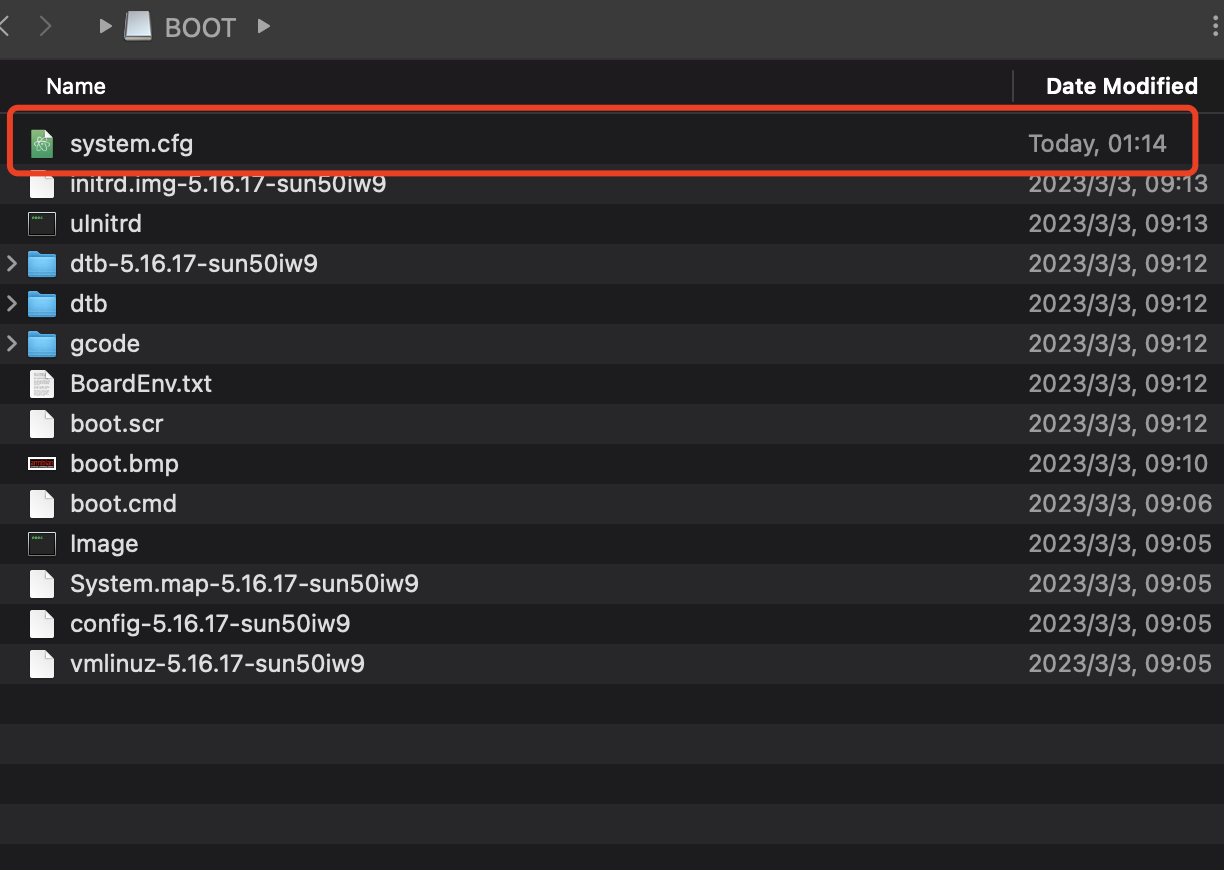
Wiring: USB cable from computer or wall supply to the M8P USB-C port. USB Type-A to Type-C Data cable from one of the M8P USB-A ports to the EBB SB USB-C port. It is best to use the one that came packaged with the Manta as this is known to work well. Canbus cable from EBB SB to M8P (Canbus two pin connector only. The red and black power wires should be taped off for safety.) Flash CB1Download the latest image name starting with CB1_Debian11_Klipper from the BTT Github (opens in a new tab) Then use balenaEtcher to flash it into your TF card. You don't need to unzip the image. When the flash is done, replug the TF card in your PC. You should be able to access the BOOT partition on the card from your PC's file manager of choice.
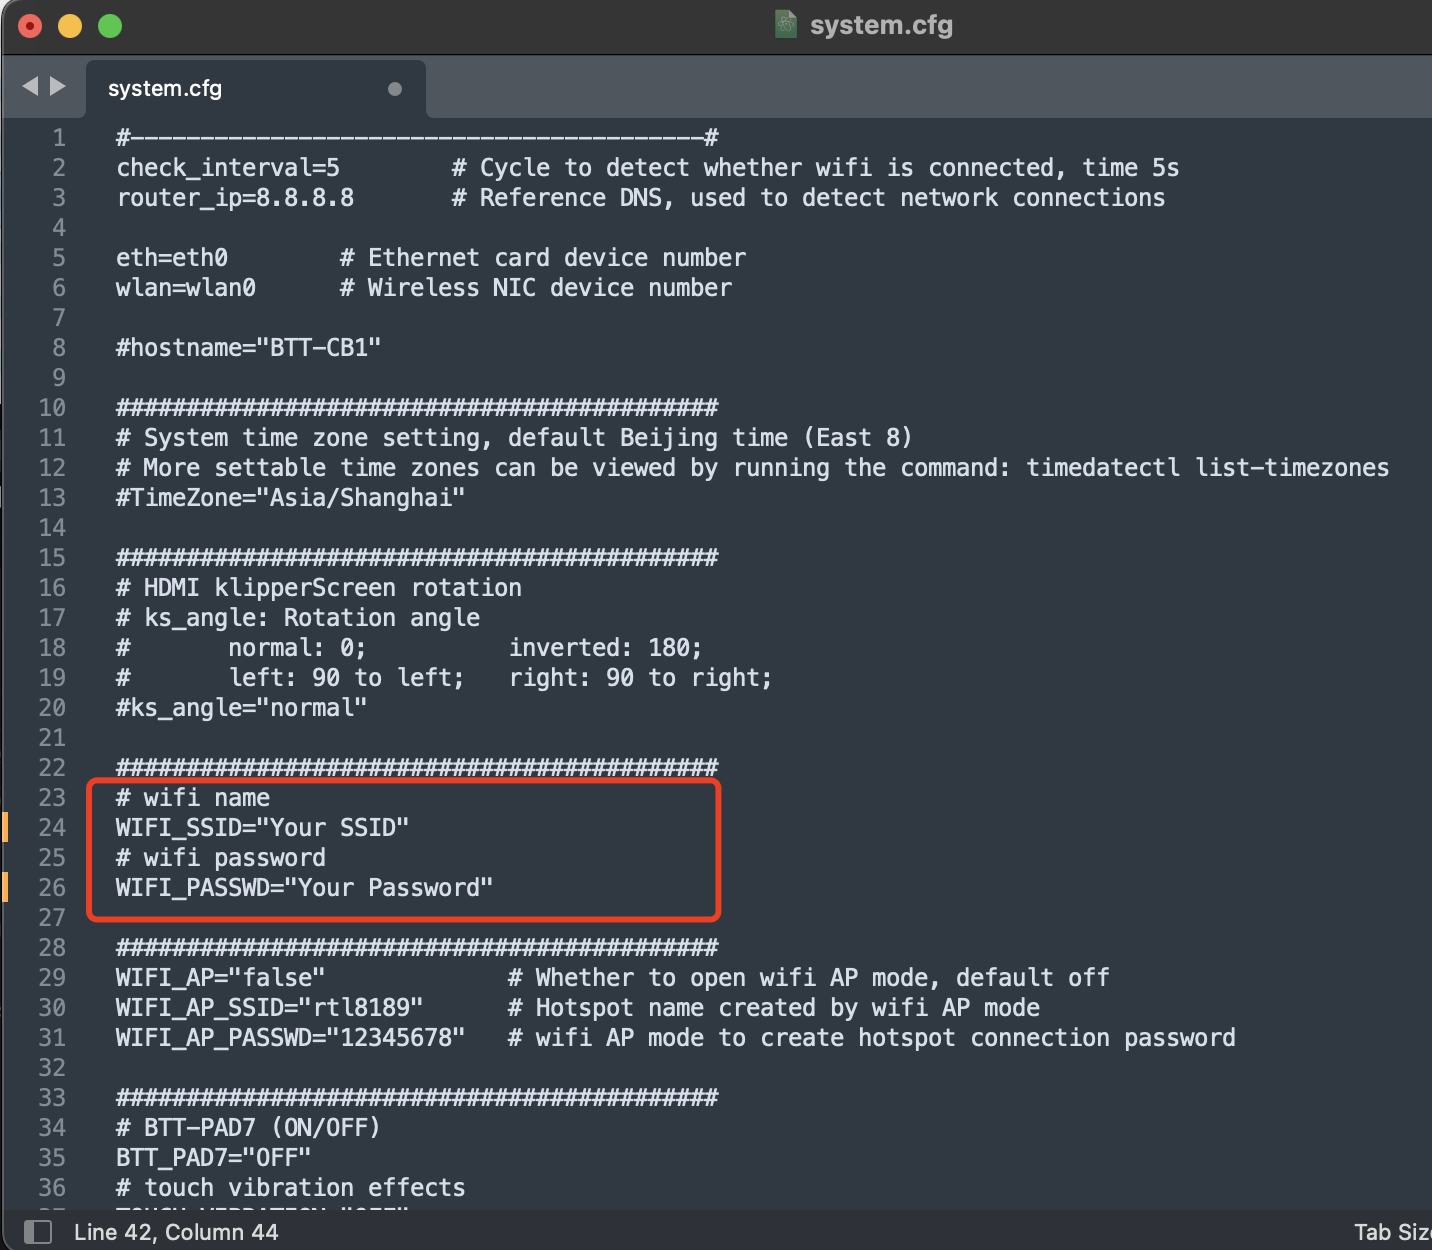
Edit system.cfg and change the WIFI setting to yours by replacing the values within the quotes (do not delete the quotes themselves).
That's all. Now just eject the card from the PC, install the card to the M8P, and install the CB1 to the M8P. ⚠️The TF card must install to the SOC-CARD, not the MCU-CARD slot. It takes more force than you'd expect to install the CB1 on the M8P. You will feel it snap into place when properly inserted. Visually inspect the CB1 after mounting to ensure that the CB1 is flush against the Manta on all four corners.
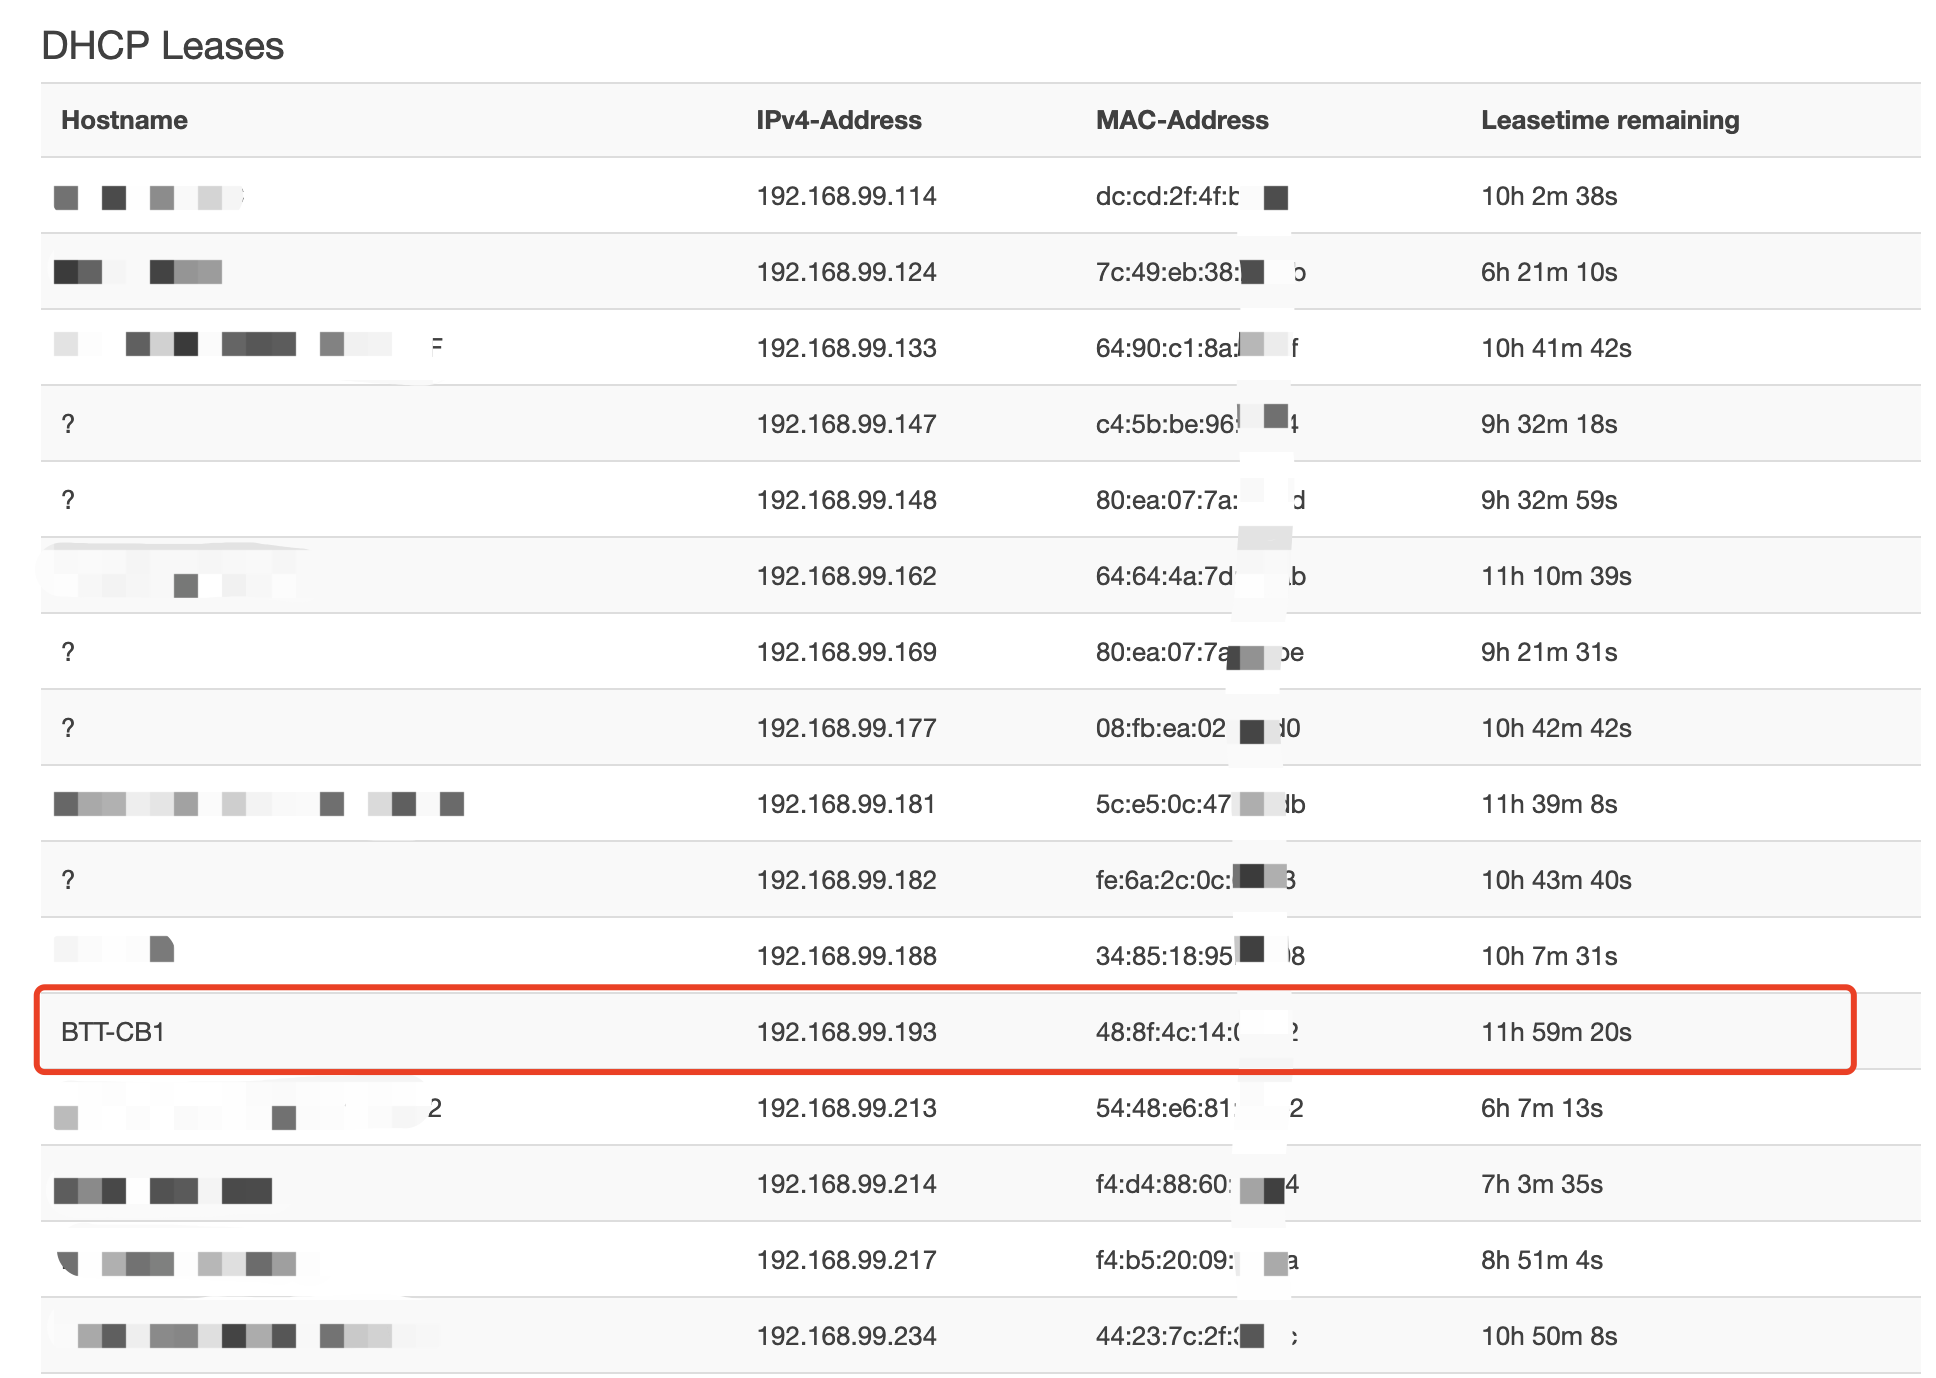
Now power on and wait a few minutes, you should be able to see the CB1 IP address in your router.
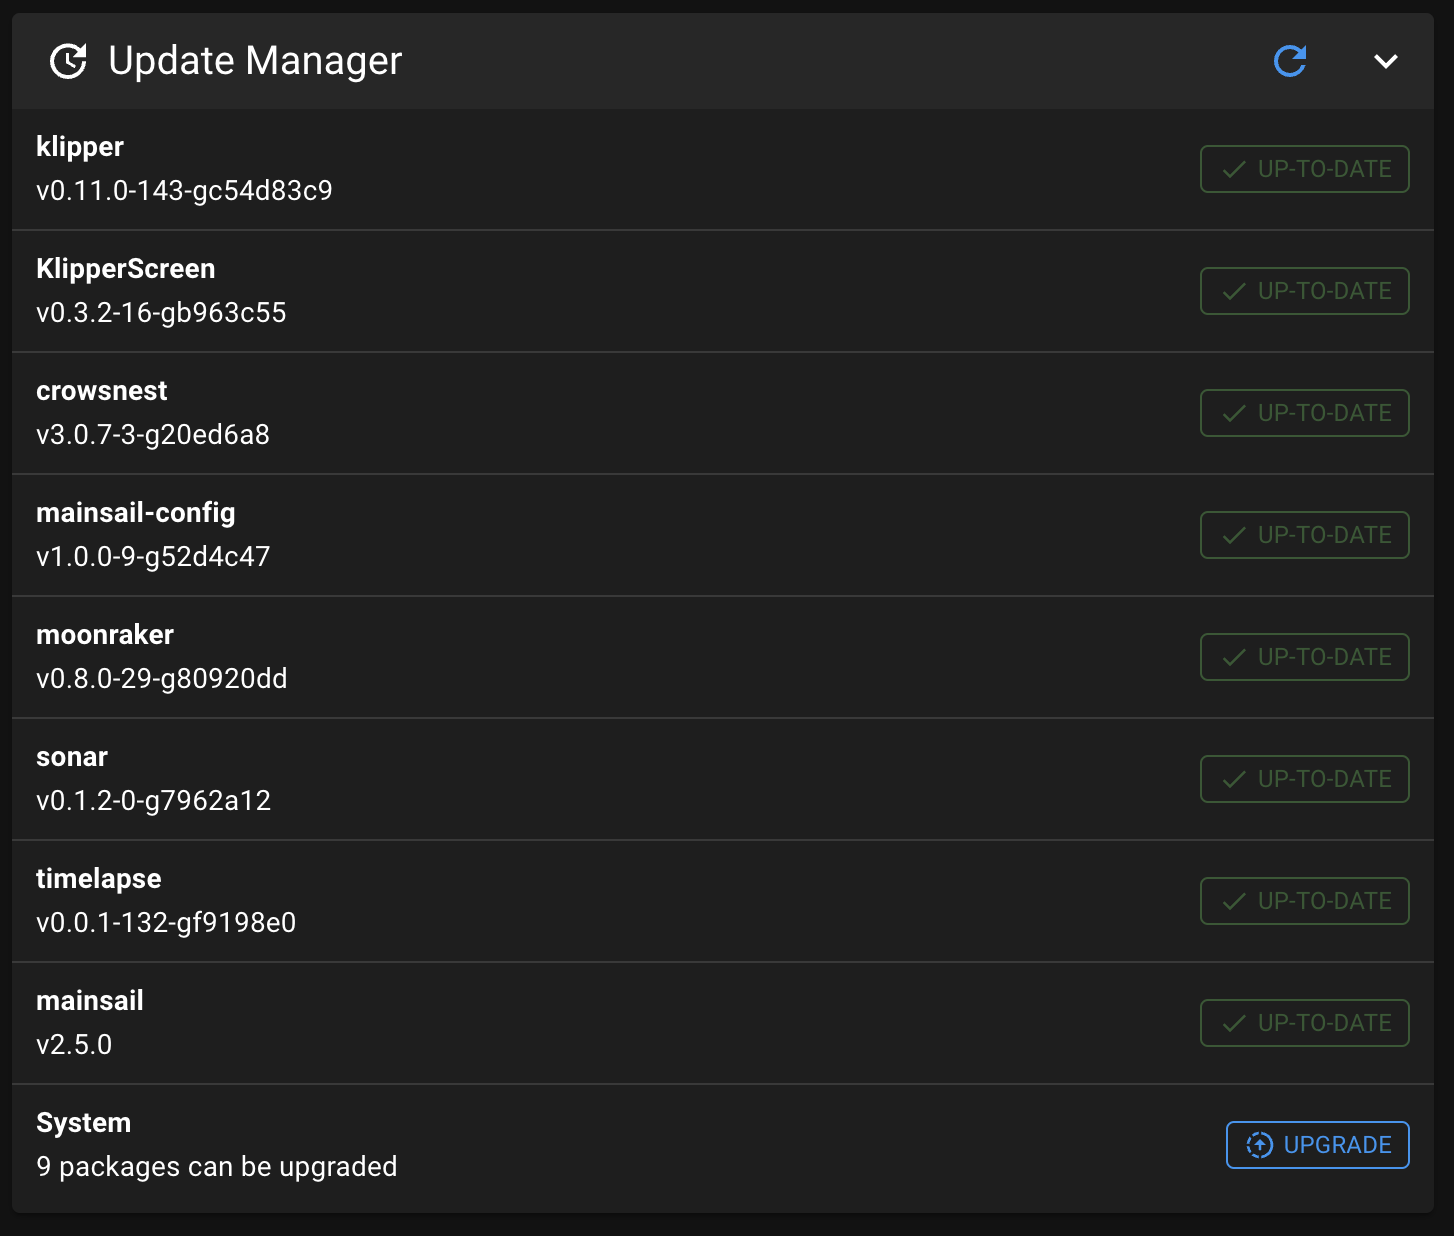
Use your browser to visit the IP address shown on your router. The Mainsail web interface should be displayed. [Optional] UpdateWe recommend updating Klipper to the latest version before proceeding.
These instructions and many of those that follow are done on the CB1 itself. The CB1 is accessed via an SSH terminal interface. How you do this is up to you. You can use a program like Mobaxterm to give you a bit of a GUI interface, but most people choose to use the Command Prompt on Windows or a Terminal program on MacOS / Linux. We use a $ symbol to show most of the single line commands you need to type into the command line (like the ssh command that follows). Commands that might generate a lot of output from the CB1 are preceded with something that looks like biqu@BTT-CB1:~, and will be followed by the expected output from the CB1 in various colors. Use ssh to access the CB1 from your PC: $ ssh [email protected] [email protected]'s password:biqu ( |

【本文地址】